
Quick Start Guide
Introduction
Step 1 - Setup and customize your Organization
Configure your organization
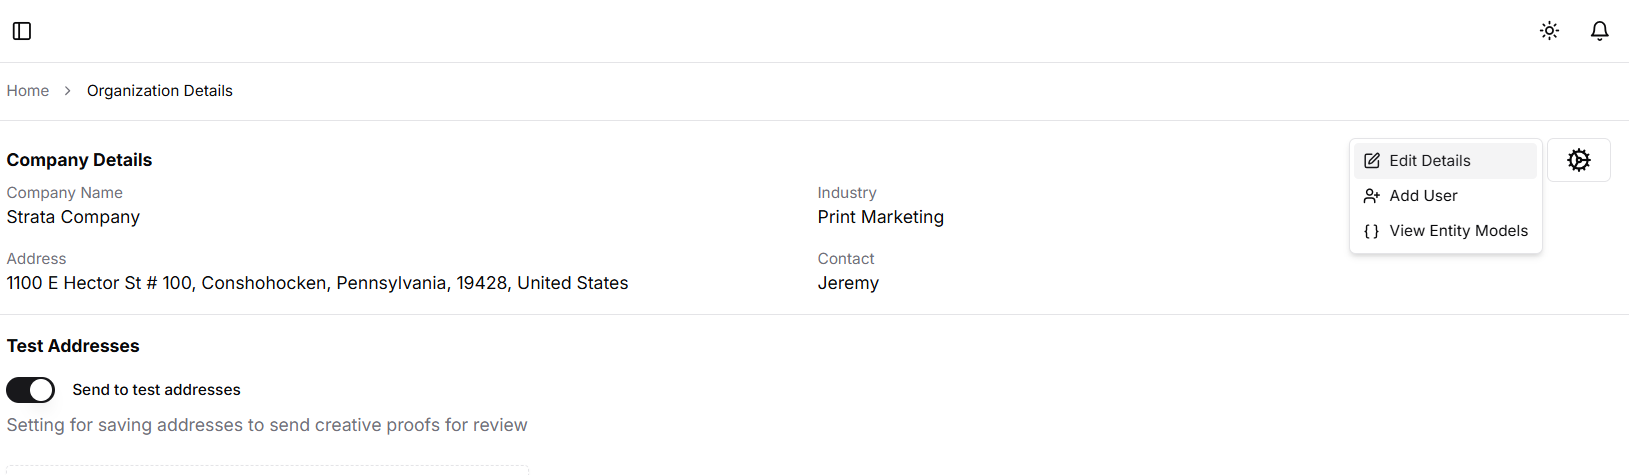
Your organization has been set up for you by your Account Manager. To check or change the details of your organization, perform the following steps:
Navigate to the Settings page.
Click the “Cog” Icon on the top left of the settings page
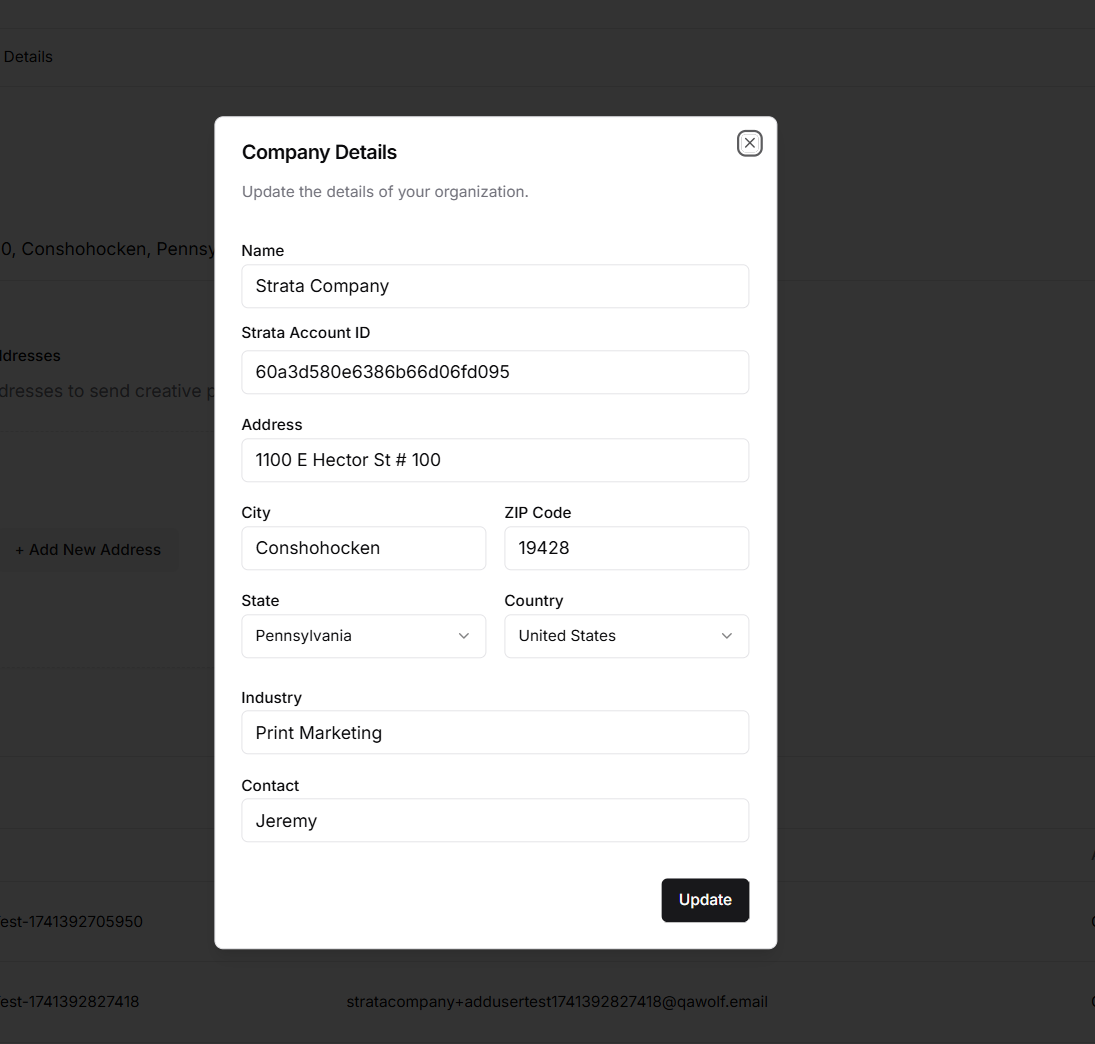
Click “Edit Details”
Add Users to your Organization
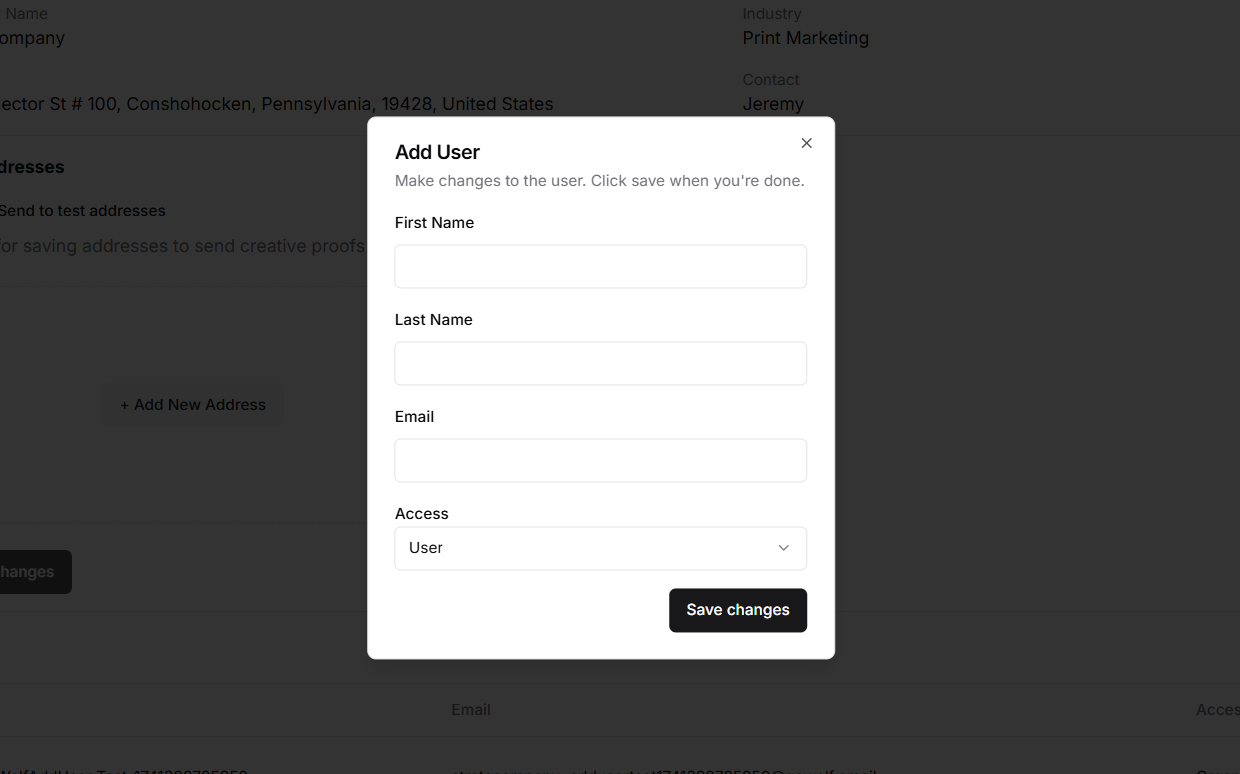
Navigate to the Settings page
Add a New User
Click "Add User"
Enter the User's Name, Email, and Access Level
Determine and set Access level. Use the authorization matrix below to determine the appropriate access level to grant.
Admin Role: Grants administrative privileges to the user.
Manager Role: Grants some administrative privileges including access to any sub-organizations that have been configured for your organization.
User Role: Grants non-administrative privileges but allows the user to setup new campaigns, configure conversion tracking, etc.
Click "Save" to create the new user. The user will receive an activation email sent to the email address configured for them.
Verify Admin Setup
The new user will receive an automated invitation email
They must click the link and set up their password to access MailTech
Configure Test Addresses
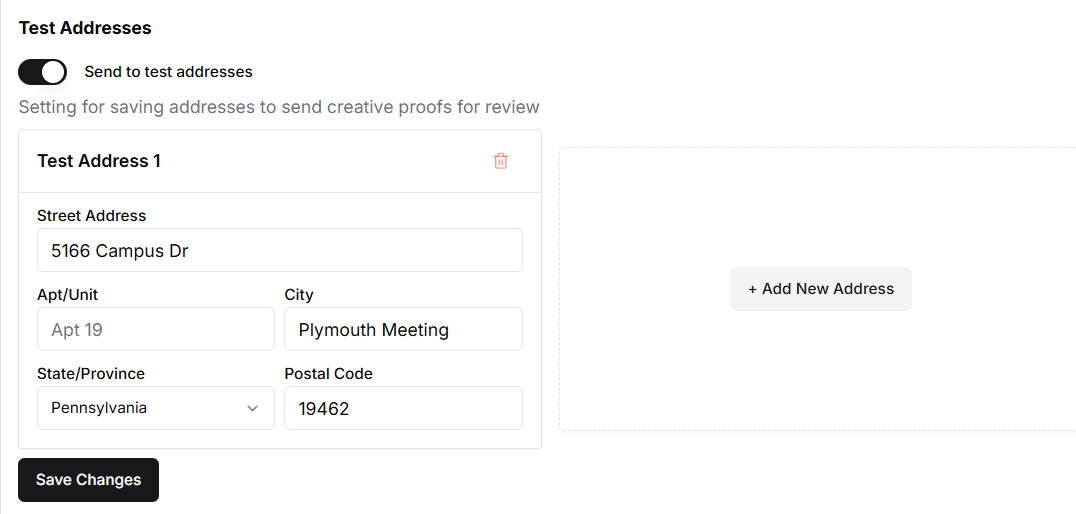
Test addresses allow you to add “Seed” recipients to campaigns. Events from these addresses are not included in your reporting.
To add test addresses, follow the steps below:
Navigate to the Settings page
Turn on “Send to test addresses”
Click “Add New Address”
Fill out the field by adding the required information
Click “Save Changes” to save the new test address
Repeat for each test address
Configure your Entity Models
Entity models control the fields that you can map imported data to. You only need to add fields that your want to use in personalization, reporting, or in-app targeting.
Navigate to the Entity Models sub-page under Settings
Review the existing fields
Create any missing fields by following the steps here: Creating a new Entity Model Field